
Fed up with artificial colors, fragrances and taste enhancers
/Science is complicated.
Just because something happens at the same time as another thing or just after another thing does not mean one caused the other. Sometimes it does. But sometimes they are just two things happening at the same time. Correlation is not causation.
But when something happens only when (or much more intensely when) something else happened right before it in many different places and at many different times to many different subjects, then the first thing probably does in some way, direct or indirect, cause the second thing.
That is what is happening and being reported by parents all over the world when it comes to artificial food coloring, fragrances and taste boosters—food additives with those indecipherable names clogging the ingredients lists of most packaged foods. One thing happens (a child eats something containing these substances) and then another thing happens (the child shakes, cries, screams, throws extraordinary tantrums, breaks out in unaccustomed skin rashes or has other reactions). Parents have reported these observations again and again, in every parenting forum I have ever come across.

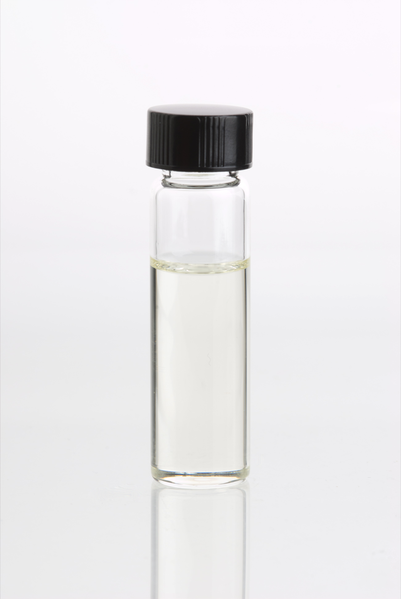
Image by Arie Farnam
But medical studies claim the evidence is “inconclusive.”
Granted, the spectrum of substances suspected of causing reactions is broad and the reactions caused are diverse. And not all kids react. Kids with attention and sensory issues tend to react more… a lot more.
It is also difficult to differentiate the energetic boost delivered by sugar and other simple carbohydrates almost always contained in the same foods from the effects of other additives. Most studies have tried to separate the two. But we don’t actually know that it isn’t the combination of sugar and the additives that is a problem for these children.
Many of the substances used to create colors, fragrances and taste boosters have been progressively banned in more safety-conscious countries in Europe, usually due to vague neurological effects, but new ones—all too chemically similar—are continually being invented.
As a parent with one child with high sensitivity to food additives and another child without particular sensitivities, I can clearly see the differences. One child doesn’t make a study, but the experiences of thousands of parents routinely dismissed and belittled by the medical establishment make for a very suspicious situation.
Given the massive lobbying capabilities of the food industry and the extreme profits garnered by these cheap substances added to foods to make them instinctively addictive to children, I call foul. I have not seen adequate research and investigation into this area yet, but the past few weeks have lit a fire under me.
Due to various allergy-type reactions to milk and other foods, I had both of my children tested for all standard food allergies about a month ago. Both of them tested negative in every category. The test did not include a test for lactose intolerance, which isn’t actually an allergy. But as soon as I got my son lactose-free milk, his symptoms cleared up.
My confidence in the allergy testing system is shaky at best, if they aren’t even with it enough to refer a kid with allergy-type reactions to milk for a lactose intolerance screening. I have also seen my ten-year-old daughter collapse, screaming with shaking hands for two or three hours at a stretch after eating a moderate amount of green food coloring on several occasions. I’ve seen her exceptionally irritable and impulsive after eating everything from a single piece of candy to a few handfuls of fake-cheese-flavored chips.
Then just recently, in the month since the allergy testing, she acquired some much coveted children’s lipstick with chemically induced “cupcake” flavoring. She smeared it on liberally and by her own admission ingested a small amount. This was after a day of eating only very familiar foods, but after a few hours she was covered with extreme allergic eczema from her knees to the knuckles of her hands.
Fortunately, anti-allergenic mint salve (see the recipe here) stopped the itching within thirty minutes and cleared up the eczema in two days, a result the doctor proclaimed “miraculous.” Our pharmacist told me antihistamines generally soothe the itching within 24 hours and clear up that level of eczema in seven days.
(Caveat and disclaimer: There has not been enough study of mint extracts for eczema. There are few side effects reported, but skin rashes should be consulted with medical professionals. If your doctor agrees, mint salve might help. I have seen it help in many cases, but with other types of allergies it had no effect.)
The lack of rigorous research on the harmful affects of food and cosmetics additives continues to be problematic. This is not a difficult issue. There is no need to color foods or cosmetics or enhance fragrances or tastes. What if companies were forced to compete based on the actual basic quality of their product, plain and simple, rather than relying on manipulative manufactured substances?
How does a company making lipstick marketed specifically to young children get away with including heavy-duty fragrances and taste enhancers that make children obsessively want to eat a product that has not been tested as a food?
I am constantly under attack from these products. My kids beg for the products they see in advertisements on children’s TV shows or that their friends have. Other adults gift them to my children. The worst of them are very dangerous. But beyond that many of them are just damaging and hazardous to long-term health. Some sensitive children react to these harmful substances immediately. But that does not mean that they don’t still silently harm the health of less sensitive children as well. It is altogether possible that children with sensory and attention “disorders” are our canaries in a coal mine.
Because I want to protect my children from hazardous substances contained in most of the products on the supermarket shelves and I actually stand my ground on it, I am called an “extremist” or accused of having “extremely high standards.” These shouldn’t be considered high standards.
Just make food. Just make lip gloss. I can grow the ingredients and make both from my own home with no chemicals and they taste great and they last.
Substances must be thoroughly investigated, including long-term health and neurological effects, before being approved for food or cosmetics use. Even more fundamentally, there is no reason for substances which manipulate and deceive the senses. No manipulative or addictive product should ever be marketed to children.
It is not that I want to control what other people do. I don’t want them around me. I don’t want them invading my space. I don’t want to be pressured over them. I don’t want my children manipulated by them or given them by friends.
If it isn’t cupcakes, it shouldn’t taste and smell like cupcakes. Cupcake flavor and smell should be what it is—flour, sugar, butter, real strawberries, in season, brief and real. Period.