Time to harvest a power herb to fight coughs: Home Medicine Cycle 14

My husband grew up with two chain smokers in the house, and then he lived in a Eastern European metropolis heated by coal in a particularly smoggy hollow for another ten years. He drives a lot on clogged freeways for his job as a surveyor. Of course, he has a chronic cough.

Common Thyme flowers - Creative Commons image by Magnus Manske

Common Thyme flowers - Creative Commons image by Magnus Manske

He's been to a string of specialists. He's had his share of infections and sometimes it takes antibiotics to clear up the infections, but for the first six or seven years we lived together he always had a chronic cough from October to April. He'd get tested and often as not he was told that there was no infection detected.

"You're airways are just oversensitive," the specialists said. They gave him synthetic pharmaceuticals and none of them helped appreciably. 

Yes, this is another one of those stories. It is worth noting how many times herbal medicinals work in precisely those areas where modern pharmaceutical medicine is weakest - immunological issues, chronic disease and systemic health problems. It is not so much a question of which type of medicine is "better," but a question of informed choice and using both pharmaceutical and herbal medicine to compliment each other. 

In this case, I didn't immediately try my own home herbs. I was a beginning herbalist at that time (about ten years ago) and I didn't have enough confidence in my own local herbs. I assumed that cures to big problems had to come from rare and powerful sources. So, after we had been through the wringer of mainstream medicine, we went to a professional herbalist. He suggested one extremely expensive herbal product and then another. The second one was the magic bullet.

It was an Ayurvedic mix of exotic herbs in capsule form from a foreign company. It had a hefty price tag, but it worked. If he took it for several weeks, the cough subsided. When he stopped taking it, the cough returned. It wasn't coincidence. For two winters my husband kept his chronic cough at bay with this mixture... and then the company stopped exporting to our country. 

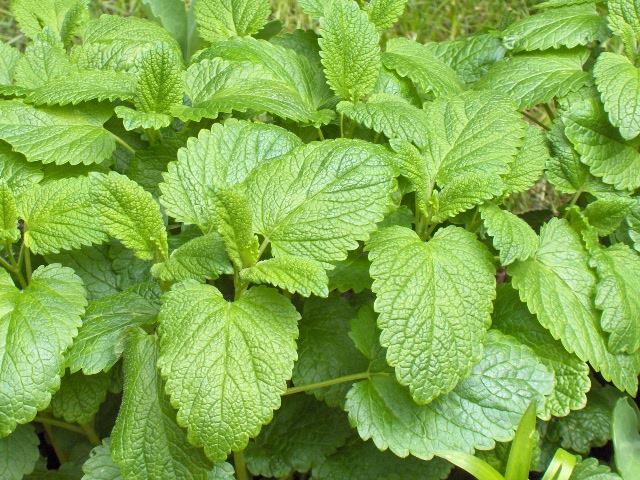
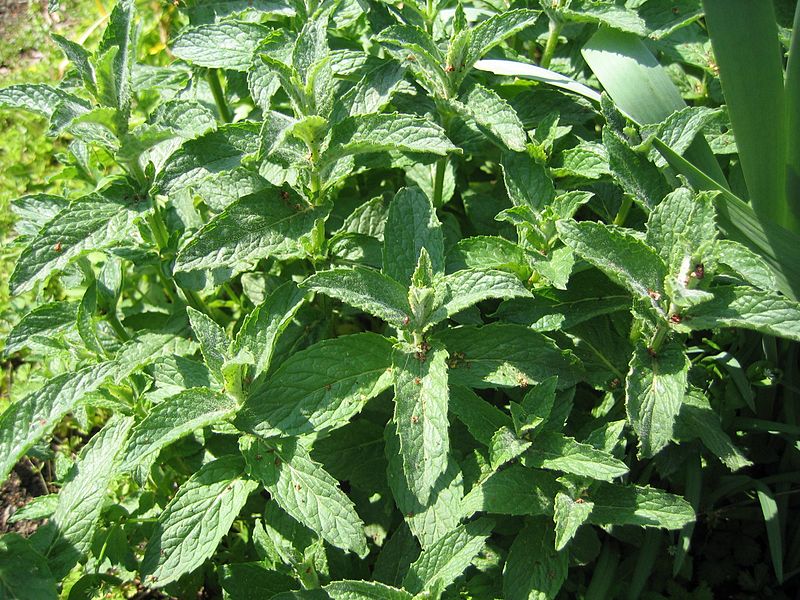
I spent a small fortune finding and ordering the product abroad one year, but by then I had become a bit more skilled in herbs and I started to wonder if I might be able to come up with a formula of local herbs that would work. I had noticed that my husband's cough responded a bit to thyme tea, so I started giving him doses of thyme tincture every day. I added various other herbs to this (including plantain, ground ivy, marshmallow and mullein). After a few months, I hit on something that worked in his particular case - a combination of thyme and mullein tinctures. 

Wild Thyme flowers - image by Summi of German Wikipedia with GNU Free Documentation License

Wild Thyme flowers - image by Summi of German Wikipedia with GNU Free Documentation License

The lesson in this experiment is much bigger than the fact that thyme and mullein are generally good for chronic coughs. Every individual is different and the underlying causes are varied. So, it may not always work the same. The greater lesson is that you can often find a local source of herbs that are much fresher, safer and less expensive than the herbs sold in shops. A good professional herbalist can also help with this. I don't trust "professional herbalists" who will only sell you expensive formulas rather than consult with you and help you figure out which herbs you can grow yourself.

You do need time and patience to test out various combinations like this. And in most cases, you need to remember to take herbal medicinals consistently, according to the schedule for that particular herb. My husband's chronic cough has come back at times - always when he neglected to take the tinctures. And once started it takes as long as a month to go away again after he resumes taking the herbs. 

Still, this was also the case that has proved the extraordinary power of thyme to us. GreenMed Info reports 25 studies indicating the therapeutic value of thyme in treating bronchitis. We use thyme for other things as well - in tinctures, salves and teas.

Thyme is one of the herbs most widely used in pharmaceuticals in Europe, so here at least there is a blurred line between synthetic and herbal medicine. I am still convinced that fresh, homegrown thyme is far superior for medicinal use.

In the Czech language the common name for wild thyme translates as "mother's soul." Some people find the smell of thyme unpleasant or even just too intense, but my family loves it, especially the purple wild thyme. Thyme is one of my favorite teas and we rarely have enough to be able to just drink it for the enjoyment of it. I have to save it for my husband, so I only drink thyme tea when I'm truly sick and then I really enjoy it. Thyme tea is good for coughs, sniffles and sore throats as well as aches and pains.

Thyme makes a good tincture (see the recipe here), which is useful for:

  • Chronic coughs and bronchitis
  • A pain killer for menstrual cramps (Here's a study on this one. It appears to mention consuming highly diluted essential oil internally. But that is never a good idea outside of a doctor's supervision. Essential oils, particularly those of intense herbs like thyme, can be very dangerous and even fatal when taken internally. I suggest using tincture instead.)
Bundle of thyme - public domain image

Bundle of thyme - public domain image

Thyme infused oil (recipe here) is one of the best oils to use in making a salve for cuts and scrapes because it is mildly disinfectant. There are studies showing the antibiotic action of thyme and its constituents in laboratory tests, which may account for how helpful thyme is in salve. 

It is useful to note that when gathering thyme the most potent part of the upper plant is the flower. We always gather our thyme when it is flowering. Sometimes we get two cuttings. My favorite type of thyme is the creeping wild variety with purple flowers. Some herbalists believe the common white-flowered variety is stronger and I haven't had enough experience to compare directly. The common thyme tends to have a somewhat less inviting smell for tea, but may be actually somewhat more effective in disinfectant salve.

Feel free to comment, ask question and add your own experiences using the icon on the lower left. And please share this article with your friends using the icon on the lower right. 

I would like to invite you to my hearth-side email circle. This is a small group of readers with whom I share the occasional virtual cup of tea and links to my latest writing. This is my protected, spam-free corner of the internet, so that's all you'll receive. 

Note: This does not constitute medical advice for a specific person with a specific problem. We are all individuals and I'm not a doctor who can prescribe treatments for you personally. 

A balm for bruised spirits, cold sores and sore throats: Home Medicine Cycle 13

My mother and I are running a bit of a competition between lemon balm and her antiviral prescription medication. The issue is that we both have the herpes virus which causes periodic cold sores. In my twenties and early thirties I used to have terrible cold sores every other month. I just slathered on Carmex (to very little effect),  tried not to touch them and felt depressed at the idea that this was to be my fate for the rest of my life.

Lemon balm leaves - image licensed under CC BY-SA 3.0 via Wikimedia Commons

Lemon balm leaves - image licensed under CC BY-SA 3.0 via Wikimedia Commons

Then I read that lemon balm, that most mild and unassuming herb is specifically indicated to combat the herpes virus. I was initially very skeptical, needless to say. Modern medicine would love to be able to conquer herpes and here the answer is supposed to be in a neglected corner of our herb gardens. 

Well, nothing gets my attention like dramatic results. So far, I've had one cold sore that got away in the past ten years. My mother has been using pharmaceutical antivirals during the same period and she has had only two or three bad cold sores that she's mentioned to me. So, both of us have seen vast improvement.

The fact that she has had more cold sores than me can't necessarily be entirely put down to lemon balm being better than pharmaceutical antivirals, because both are very dependent on how quickly you manage to apply the medicine. The pharmaceutical antiviral is a pill that you swallow. Lemon balm is either a salve or a mashed-herb poultice. I have found that lemon balm salve is definitely most effective if applied at the first tingling feeling that a cold sore is on its way. The same thing holds true for my mother taking pharmaceutical antivirals. A cold sore can be prevented but she has to take the pill immediately as soon as she notices the first sensation. 

I now carry a small jar of lemon balm salve everywhere with me because if a cold sore starts to develop, I have usually no more than two hours to put the salve on or I'll suffer the consequences. Certainly, lemon balm salve is helpful even with run-away cold sores. Even the one that broke out because I didn't put the salve on quickly enough was small and dry (rather than large, brilliantly red and pussy, like they are normally). But still I'd rather not have a cold sore at all. 

Whether or not my mother and I ever resolve our difference of opinion over which is absolutely more effective, I can say for certain that lemon balm salve works well enough for me.  The lemon balm grows in my herb garden for free, while the antivirals are quite expensive. I know what's in the lemon balm and none of it is bad for you. I can't guarantee the same thing about the antivirals (and I wouldn't trust their manufacturers at the end of a ten-foot poll). And if I did have any doubts, the fact that lemon balm is applied topically rather than taken internally is always preferable. I usually only have to apply the salve once to prevent a cold sore, so there are really no disadvantages to the salve that I can think of.

This illustration of lemon balm can help you to identify the plant - public domain image by Gideon Pisanty

This illustration of lemon balm can help you to identify the plant - public domain image by Gideon Pisanty

Now there are several clinical studies to prove that lemon balm is effective against herpes. This one is unequivocal in stating that lemon balm is effective. (Even though it calls it balm mint, which is a less common name, it is correctly botanically identified.) And that is actually surprising given that the lemon balm treatment given during the study was a very diluted and heavily processed cream. A salve made at home by my recipe (click here to get it) is likely to be a bit more dramatic in effect.

Other studies have indicated that lemon balm may actually have wider antiviral uses, including against HIV-1 and HSV-2 viruses. I would use lemon balm tincture, if I were trying to fight a system-wide viral infection.

Traditional herbalists claim that lemon balm syrup is helpful with strep throat. I haven't personally seen clear effects with strep throat and strep isn't a viral infection, though it may be exacerbated by viral infections. Even so lemon balm is soothing on a sore throat. Given that strep throat piggybacks on a lot of viral infections and other types of sore throat often are viral, taking lemon balm either as tea or syrup when you have a sore throat may help to relieve symptoms. (Check with a doctor if you have a sore throat for more than three days.)

Lemon balm is also useful as a tea or tincture (recipe here) for the following problems:

  • Stress and anxiety (Studies confirm it)
  • Sleep problems, particularly in menopause (A study)
  • Radiation protection (Radiology operators have used it for protection.)
  • Alzheimer's disease (A study)
  • Infant colic, diarrhea and irritable bowel syndrome (in this case the nursing mother should drink lemon balm tea herself and the effects will be transferred to the infant through breast milk.)

Take altogether, I've had to seriously reevaluate my assumptions about this mild and humble member of the mint family. It will always be a staple herb for my family and I eagerly await further research into its uses.

Feel free to comment, ask question and add your own experiences using the icon on the lower left. And please share this article with your friends using the icon on the lower right. 

I would like to invite you to my hearth-side email circle. This is a small group of readers with whom I share the occasional virtual cup of tea and links to my latest writing. This is my protected, spam-free corner of the internet, so that's all you'll receive. 

Note: This does not constitute medical advice for a specific person with a specific problem. We are all individuals and I'm not a doctor who can prescribe treatments for you. 

How to make an effective healing salve: Home Medicine Cycle 9

Readers of my Home Medicine Cycle are usually looking for simple, practical ways to use medicinal herbs at home. I go to the doctor as do most of you, I expect. There are a great many good things about modern medicine. 

And yet there are a few things that fresh, home-grown medicinal herbs still do better than the pharmacy.

Skin care is one of them.

From supposedly incurable eczema to allergic reactions and small infected cracks that even antibiotics won't heal, I've seen a lot of skin problems that pharmaceutical ointments were not been able to handle. And more often than not, I've seen medicinal herbs from my humble garden clear them up in less than a week.

I say my garden is humble because it is. I don't grow herbs to sell them and I don't sell my remedies. In fact, I have a hunch that purchased herbs will never be as effective as home-grown and home-brewed remedies unless they are from a tiny cottage industry, because any time you put herbs into a big processing system they end up freeze-dried, preserved and over-processed, which appears to significantly cut their medicinal potency. Maybe there's a way to make effective commercial herbal remedies, but I haven't seen it yet. 

I'm a mother doing this for my family and for the odd friend who drops in. I have two beds of herbs and I gather a few others in nearby empty lots. What I do isn't industrial herbalism and anyone with a garden or even a few window pots can do a lot of what I do. That's the whole point of this Home Medicine Cycle. It's about practical herb lore, herbal remedies that just plain work and things you can do to take back your own health. 

So lets get down to business. The herb harvesting season is finally well underway. I'll be posting here more often over the summer and I'll often focus on one herb at a time and its uses and specific recipes. But this time I want to give you a core herbalist skill - the simple method of salve making. 

I first learned this from Jennifer Moore, an herbalist in La Grande, Oregon, and later read about similar techniques in The Herbal Home Remedy Book, which is a simple, practical guide that's easy for non-experts to follow. I've been making herbal salves for a dozen years now and this method simply works. I've perfected a few of the steps based on experience in my own kitchen. I hope that you can try this out and gain a tool for treating common skin problems, bruises, burns and skinned knees. 

Salve making has several steps. There are three basic stages--collecting herbs, making infused oil and cooking the salve.  The first stage takes however long it takes, but often no more than a few minutes if you have started growing your own herbs. The second stage takes from two to three weeks of mostly passive waiting. The final stage will generally take a couple of hours of kitchen time. I'll list the equipment you'll need for each stage in a box.

Collecting herbs

Step 1:  Choosing herbs and essential oils 

There are a great many herbs you can use to make herbal salves. I will go into depth on some of these in other posts and link from here whenever possible. You can even use only purchased essential oils diluted in a carrier oil and leave out the whole section on infused oils, but I recommend using infused oil together with essential oils, because they each provide different types of medicinal benefits and essential oils alone don't appear to provide the same kind of relief of symptoms.

The second stage of this guide will show you how to make an infused oil that is a key ingredient in medicinal salve. Here's a short list you can use to determine which herb or herbs might be most useful for your specific needs.

Herbs for infused oil:

Mint - image by Gogo of Wikipedia

Mint - image by Gogo of Wikipedia

  • Plantain leaves: For an excellent, speedy healing salve and to add to other salves
  • Mint leaves: For an amazingly effective eczema salve
  • Nettle leaves: For anti-allergenic salve (you’ll need gloves to pick and process them but just do the same as you would with other herbs and the result will reduce itching, rather than causing it)
  • The petals of calendula blossoms: For anti-fungal salve and burn remedy to use both to prevent athlete’s foot at the swimming pool and to treat mild sunburns
  • Yarrow blossoms: For a healing and mildly disinfectant salve that slows bleeding
  • Thyme blossoms and leaves: For healing and disinfectant salve to use on scrapes and small cuts
  • Lavender blossoms: For a good smelling salve that helps disinfect and dry out oily adolescent skin
  • Lemon balm leaves: For lip gloss that wards off cold sores with specific anti-viral action
  • Comfrey leaves:  For bruises, sprains and poorly healing (but thoroughly clean) wounds
  • Arnica leaves and flowers: For bruises
  • St. John's Wart flowering tops: For disinfectant salve for cuts and for burns (but keep in mind that the salve will increase the skin's sensitivity to the sun, the opposite of sun screen.)

It's also helpful to add some essential oil to your salve. While you won't need this for a couple of weeks, I'm mentioning these here because you may have to order the right essential oils through the mail and now is probably the time to do that, so that you will have them when the time comes. Choose an essential oil or two depending on your specific needs.

Essential oils for use in salve:

  • Mint essential oil is good to combine with mint infused oil for an excellent eczema salve. Mint essential oil is quite cooling and will help with any itchy condition, so it is good to add it to nettle, calendula and plantain salves that will often be used for itchy things.
  • Pine, sage or thyme essential oils help fight germs, so use them in salves that will be used on scrapes and cuts
  • Lavender essential oil smells wonderful and is mildly disinfectant. Good for anti-pimple face salve.
  • Tea tree essential oil is strongly anti-fungal but it doesn’t smell very good for general use. Use it for anti-fungal salves, such as for athlete’s foot.

Step 2: Collecting herbs

When you go out to collect herbs, make sure that the area hasn't been sprayed with pesticides and herbicides. Many of these chemicals are highly toxic and those used on lawns and hedges are often not approved for food or medicinal crops, so they are likely to be even worse than those you find on non-organic produce. It is usually inadvisable to collect herbs in maintained parks or other places with mowed lawns, unless the owner has told you they don't spray (and given you permission to gather). 

In stage one you'll need:

  • scissors and/or clippers
  • a basket or paper bag
  • possibly some diluted geranium essential oil to ward off the ticks (see my post on this) 

The herbs I have listed are among the safest herbs for use in salves. Still, it’s best to choose herbs that you already know and can find locally when you’re first starting out. Check your identification of plants and be aware that while it’s rare, some people do have allergic reactions even to mild plants. 

Most salves use above-ground parts of plants, either leaves or flowers. It is rarely necessary to dig up or pull up the plants and this should be avoided. Use scissors or clippers to cut stems and flowers, whenever possible. This will avoid bruising the plants, which is better for your collected herbs and better for the plants that will grow medicine for you again in a few weeks.

Gather enough of the herb so that you can fill a small canning jar with pieces of it. For a family, one quart jar of infused oil per herb is usually plenty for the year. I sometimes make two jars for my most useful salves because I have a lot of friends who come around asking for them. You can store your herbs in the refrigerator for up to two days before going on to the next stage or you can dry them and use dried herbs for the next step, but I recommend using them fresh whenever possible.

Cutting herbs.jpg

Making infused oil

Step 3: Separating and cutting herbs

Separate small flowers such as yarrow and lavender and small leaves such as thyme from the stems by gripping the stem firmly in one hand and the flower or leaves more loosely in the other and pull the stems to strip off leaves and flowers. Cut large leaves or blossoms into half-inch pieces.

Step 4: Putting the herbs into infusing jars

In stage two you will need: 

  • a knife
  • a cutting board
  • clean glass jars with lids
  • olive, almond or another oil
  • a butter knife or chopstick
  • a spoon
  • sticky labels or paper and clear tape
  • a waterproof, permanent marker
  • a sunny window sill or an undisturbed spot outdoors

Try to use jars that are just large enough to contain your herbs. Your oil will be preserved better if the jar is pretty much full of herbs.

Sterilize your jars either by pouring boiling water over them or by running them through the dishwasher.

Gently pack your chopped herbs into clear glass canning jars. They will stay down correctly in the next step if you have packed them in a bit rather than letting them be fluffy and loose. Your salve will also be more potent.

Step 5: Pouring oil into the jars

Choose a base oil for your salve. I use olive oil because it is cheaper than most and good for dry skin. You can also use almond oil or even lard. It may depend on if you have any sensitivities to certain oils and what is available.

Pour your base oil into the jars until the oil completely covers the herbs. Use a butter knife or a chopstick to stab down into the jar and release air bubbles. This will require you to pour in more oil. Keep topping it off until the air bubbles are all gone and the oil stops trickling down inside the jar. Make sure all the bits of herb are under the oil. It’s important to keep them covered or they can grow mold. Use the back of a spoon to gently press stray leaves and petals down under the surface.

Step 6: Labeling your jars

Write the name of the herb and the date on each jar. Do not skip this step. You really will not remember and the herbs will not look the same once the oil is brewed.

Step 7: Brewing your infused oil

Gently close the lids to your jars. Don’t screw them down tight.

Then set your jars someplace where they will get direct sunlight for at least a few hours of the day. The rays of the sun will both act to preserve the oil and release the medicinal compounds of the herbs into the oil.

Check your oil once a day for the first few days. Stick your butter knife or chopstick down to the bottom of the jar again to release any extra bubbles and top off the oil again. Make sure all the leaves and petals are covered by oil and close it up again.

Wait two to three weeks and your oil will be infused by the energy of the sun.

Cooking the salve

Stage three can be done all in one day or you can strain your oil and keep it in the refrigerator for up to two weeks before making salve.

Step 8: Straining your infused oil

In stage three you will need:

  • a glass or ceramic bowl
  • cheese cloth or straining cloth
  • scissors
  • more clean jars to store your strained oil in
  • A pan (use enamel if possible, otherwise stainless steal, if possible use a pan that will only be used to make salve as it will be difficult to clean)
  • a stove with a low heat setting
  •  bees wax cut into pieces
  • a spoon
  • essential oils
  • liquid vitamin E or large vitamin E capsules and some very sharp scissors
  • new or recycled salve and lotion containers or small jars and plastic containers
  • a ladle or a measuring cup with a spout
  • a funnel
  • Sticky labels or paper and tape, a good permanent pen or a printer

Cut a large piece of cheese cloth for each jar of infused oil. Place a piece of cheese cloth over your bowl and carefully dump the contents of one of your herb-and-oil jars onto it. Grasp the corners of the cheese clothe and lift it so that all the herb material stays in the cheese cloth. Carefully wrap it into a package and wring it out like a wet swimming suit to get all the oil out of the herbs.

Look at the interesting colors of your oil. Some will be very dark green or almost black, others will still be light and golden, some may even be reddish. This depends on which herb you have used.

If necessary, you can store this strained oil for a few days before making salve but you now have to store it in the refrigerator and don’t forget to label it again!

Step 9:  Heating your oil

Pour your infused herbal oil into a pan. You can make several different kinds of salve by heating each type of oil separately, thus intensifying the properties of each herb, or you can make a salve that combines a little of each of the properties of the herbs. If you mix them all together you’ll have a general healing salve, but it won’t be as strong for a specific purpose. Even so, I often add a little plantain to a lot of different salves because it is good for almost everything.

Heat the oil slowly on a low heat while you prepare the other ingredients of your salve. Try NOT to let your oil boil. Some herbs lose medicinal potency if they’re boiled, so use a low heat and keep an eye on it.

Caution: Boiling oil is notorious with good reason. It can spatter, causing significant burns, and even catch fire.

Step 10: Adding wax and testing for consistency

Now is when this starts to look like magic. Once your oil is warm, add some pieces of bees wax to your oil and slowly melt them. The official ratio is about one ounce wax to one cup of oil but this isn’t exact.

I suggest starting with a chunk of wax about as big as a tennis ball for a quart of oil. Let the wax melt into the hot oil. Then turn off the heat and put a small amount of the hot oil onto a spoon and place it in the freezer for 3 to 5 minutes until it is cool but not freezing.

Then test out the consistency of the salve on your skin. You’ll want a different consistency for different things. A lip gloss should be pretty firm and a facial salve will also want a bit of set to it, while a salve for eczema or scrapes will need to be a little softer but still thick enough to hold its shape.

If the salve isn’t thick enough yet, add some smaller pieces of wax, let them melt and try the spoon in the freezer again until you get the right consistency.

Then turn off the heat and take your pan of the stove.

Step 11: Adding good smells and preservatives

This is where you get to use the essential oils you chose in step one.

Both essential oils and vitamin E are heat sensitive, so do this step once the heat is off. Add about 20 to 30 drops of essential oil per half quart of oil. Be careful not to put your face right over the pan while you do this. The vapor from hot essential oil is very intense and can burn your eyes and nose.

Stir and add a teaspoon of vitamin E or cut open and squeeze out five or six capsules of vitamin E. Vitamin E helps to make your salve last longer and it is good for your skin when it’s diluted.

Don’t leave undiluted essential oil or vitamin E on your skin. If you get it on you, wash it off. Even though it doesn’t hurt you immediately, it can cause skin damage.

Step 12:  Pouring your salve into containers

Carefully ladle your oil and wax mixture into salve containers when it is still hot. Don’t let it cool in the pan. The salve will be very hot and hard to remove from skin quickly, so be very careful not to spill it on yourself or on children.

Step 13: Labeling and storing your salve

Let your salve cool and solidify before you move it, but on’t forget to label your salve containers right away. It will be impossible to tell which kind is which later or even to remember what exactly you put in it, even if you made only one kind. Include the date. Salve made like this lasts six months to a year if stored in a cool dark place.

That’s it. You’ve made real medicine that can stand up well in comparison with specialty pharmaceutical salve or ointment for healing ability, anti-fungal action, eczema reduction or allergy control.

I love hearing from you. What are your experiences and experiments with herbs? If you haven't started using herbal medicinals yet, what sparked your interest in this topic? Feel free to comment with the comment button at the bottom of this post on the left or share this post with your social networks using the share button on the bottom right. 

Note:  Please remember that this is not medical advice for your specific needs. 

Nature’s band aid: Home Medicine Cycle 8

There's a Czech proverb usually ascribed to various alcoholic beverages that claims “Where it flows it heals.” I can’t vouch for the truth of this statement with regards to Moravian wine, South Bohemian beer or even highland herbal liquor. 

Creative commons image by Sannse via Wikipedia

Creative commons image by Sannse via Wikipedia

But there is one substance of near miraculous topical healing power that I can vouch for (and if you own a small plot of grass it is very likely that you’re already growing it whether you want to or not). That is the humble plantain herb.

To avoid confusion, be advised that this herb is in no way related to anything resembling a banana. Fried plantain bananas are delicious and reasonably good for you, but this kind of plantain is something completely different. If you don’t know it already, it’s likely that you often mistake it for a odd sort of grass.

Medicinal plantain is a plant with long thin leaves. It can be best identified by the deep, stiff ridges that run the length of the leaves. Otherwise the leaves are shaped like long blades. There is a broad-leaf variety with the same ridges but it’s medicinal potency isn’t as strong. 

Narrow-leaf plantain, which grows in yards and other places where brush is cut back in a wide variety of climates, is such a staple of the herbalists cupboard that it is the first herb I would teach children to actively use. It is best used fresh and is essentially nature’s band aid. 

Here’s how to use it for the most basic first aid.

Please note that even small scrapes heal faster if you can wash and disinfect them. But you can’t always do this right away. Pull out any stingers if the problem is a bee sting. If near home, I’d opt for a baking soda and water paste first to suck out any accessible venom and then a plantain poultice. But if you’re out on a hike and don’t have anything with you, plantain is your best friend. 

  1. If you have a scratch, scrape, small cut, insect bite or sting while outdoors, look around for some plantain. 
  2. Chew or mash a leaf or two of plantain with a little water or saliva.
  3. This is called a poultice. Pack it generously over the affected spot. 
  4. If possible secure with a band aid. But just rubbing it in and holding it on for a few minutes will suffice for most minor scrapes.
  5. Also wet a leaf of plantain and stick it to the skin as a temporary band aid. Children who know from experience that mashed plantain reduces pain willl be doubly soothed by having a plantain band aid.

The plantain will not only lesson the immediate pain significantly, it will also cause the wound to heal much faster than it would on it’s own. 

This is the primary property of plantain. It assists the regeneration of cells. It isn’t particularly disinfectant and lacks antibiotic properties, so it is good to combine it with something disinfectant for any significant wound. However, where plantain is strong—in healing tissue—it is very strong indeed.

Here are the easiest uses of plantain in the home medicine cabinet:

A. In salve for poorly healing wounds: Next week I will post my super quick and easy salve recipe for plantain and other herbs. I have seen plantain salve from this simple recipe do what prescription antibiotic and healing salves could not. In the village where I live I have run into now three people with skin cracks or badly healing sores on areas that are hard to keep absolutely clean and disinfected. Each of these people had already sought out medical advice from doctors and received multiple prescriptions for pharmaceutical ointments—without relief. Each of them found that the cracks or sores closed after a week of using simple plantain salve. Keep in mind that these were cracks and sores from injury, not eczema or an allergic skin condition or a wound requiring antibiotics. But they were serious enough to cause significant pain and they were problems that standard pharmaceutical ointments didn’t heal well. These are the types of wounds where plantain is most helpful.

B. As a base for general skin care salves and washes: If I have enough plantain from the harvest I try to include at least some plantain with most of my general purpose salves, because of its amazing healing power. It is also great to have some dried plantain around to make an infusion to add to bath water for general skin care. It is so healing and soothing to whatever part of the body it touches that your skin will thank you and some conditions that require quick healing before an irritant or infection can set in may clear themselves up, even if the plantain doesn’t address their underlying allergenic or microbial basis.

C. In syrup or tea for stomach troubles, sore throats and coughs: It is good to remember that Czech proverb I mentioned in relation to plantain. Wherever it flows, it heals. Whatever it can physically touch, it will heal. Plantain hasn’t shown much ability to address systemic problems but it's great for the relief of symptoms because of its ability to immediately sooth irritated tissue and promote cell growth and regeneration. Certain types of stomach problems resulting from ulcers or irritation of the walls of the stomach may be helped by drinking strong plantain tea or syrup. Bronchial coughs where the irritation is primarily in upper air passages can be soothed and sore throats will benefit from plantain tea and syrup. Plantain can also be added to teas used for urinary tract infections and kidney stones. Again, plantain won’t solve the root problems of these ailments alone but it can mitigate the pain involved. 

D. As food: Plantain leaves are an excellent source of iron as well as calcium, magnesium and vitamins A, C and K--far better than most garden greens. The taste of young plantain leaves is mild when chopped in a salad. Fresh plantain leaves have many of the same benefits as tea and syrup, so they can be added to food both for the nutritional benefits and to help with symptoms. There is no specific limit on how much plantain a person should consume, but as with all herbs, moderation is a good idea.

E. Vitamin B supplements:  The unremarkable, brown flowers and seed heads of plantain are so high in vitamin B that they can practically be considered a vitamin supplement in and of themselves. Pick them and put them on salads to keep anemia and other health troubles at bay.

Warnings:

I must always end with the warnings, if for no other reason than to let you know what the current research says. Plantain is among the mildest herbs and it is safe for almost everyone. However, there are rare plantain allergies and people who are allergic to melons may have some reaction to plantain as well. Beyond that plantain hasn’t been studied enough when it comes to use in pregnancy, so responsible sources will generally warn off pregnant and breastfeeding women on general principle. 

I add one other warning specifically for plantain because of where it grows rather than because of the plant itself. Please be aware that many grassy areas are sprayed with extremely toxic chemicals. While you can find plantain in great abundance in many parks and other lawns, keep in mind that unless you know for certain that an area of mowed grass is NOT sprayed with pesticides, the chances are very good that it is. Choose your harvest locations with care.

And as with all herbs and medicines, keep in mind that I’m not a doctor and this doesn’t constitute medical advice. While there is a lot you can do for yourself, it is always a good idea to seek out medical help with any significant injury or illness.