
Magical healing with comfrey: Home medicine cycle 19
/The heroine lies wounded by a sword strike, while her friend the ranger frantically searches for the herb that will save her life. He finds the precious leaves and rushes to her side, pressing the magical green stuff into the wound. The bleeding stops and the wound closes before his eyes. She blinks her eyes and sits up.
This is what I grew up on. Fantasy books... often with an herbalist in them. In those stories, skin knits itself back together in moments with the touch of a miraculous plant. Or a dab of a potion on the tongue can bring characters back from the brink of death.
I knew this wasn't real. It was just fantasy. In real life, herbs are mild--a less-effective but natural alternative to pharmaceutical drugs for times when your medical problem is minor and you have plenty of time to wait for their slow action to kick in. Right?
Not exactly.
That is what I believed about herbs when I reached adulthood and what most people still believe today. But I've seen a few things that are very hard to explain on the theory that herbs are less-effective and slow-acting.
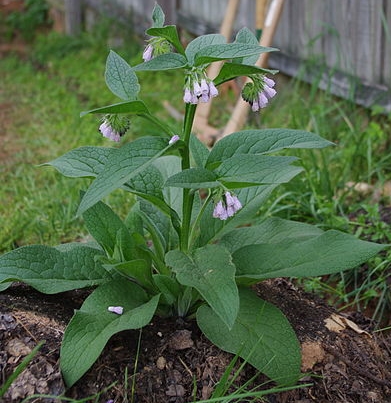
Comfrey - Creative Commons image by Finchj of Wikipedia
One incident stands out sharply in my mind. My husband had tried everything that modern medicine had to offer to deal with his painful and exhausting chronic cough. Finally, we found an herbal mix that helped, after years of trying antibiotics and various drugs. He was slowly coming around to believe that my interest in herbs was a bit more than a foolish hobby.
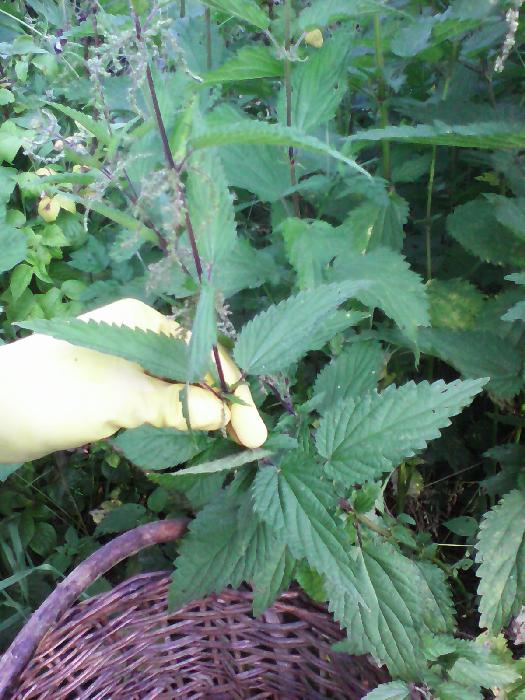
So, one evening when we were visiting his parent's farm he went out with me to gather herbs. He brought along a pair of sharp branch clippers and he was using them to cut yarrow stalks, when he somehow managed to clip his finger. It was a significant enough cut that many people would have gone to the emergency room to get stitches. It bled profusely and when he flexed his fingers it looked like a gaping mouth of muscle.
But my husband strongly dislikes trips to the emergency room and he would have had to drive himself there, given that I can't drive. His fingers still moved fine if painfully, so I was reasonably sure the clippers had not cut anything crucial. I told him to press one of the yarrow blooms against the wound to help stop the bleeding. Then I went for some strongly alcoholic tincture to disinfect the wound. Once the bleeding had slowed and the cut was very clean, I took comfrey leaves, softened them a bit with a mallet and wrapped them around the wounded finger. Then I bandaged the leaves in place.
We had small children and two elderly people to take care of and the rest of the evening was moderate chaos. It wasn't until the next morning that I managed to persuade my husband to let me look at his hand again. When we unwrapped the bandage and makeshift comfrey poultice we both stared in confusion. There was no cut.
Had I been alone I would have doubted my own memory of how deep the cut was. But my husband was equally astonished. All that was left on his finger was a fine pink line, like that of a cut that healed well several days or a week previously. I probed at the scar and it was only the tiniest bit painful. There was no redness around it and my husband could move his hand freely without the bandage.
Growing up on a homestead in the mountains and having a father and a brother who build houses and work with wood for a living, I have seen my share of cuts and lacerations. I have cut my own hands in the kitchen and dealt with the resulting sliver of pain for a week or two afterwards. I know how fast cuts usually heal, even with the help of antibiotic ointments from a pharmacy. And this was ridiculously fast--on the level of those fantasy epics I used to read. How can a deep cut heal in twelve hours?

A coloured etching by M. Bouchard, 1774 - Comfrey has been used by herbalists for centuries
I started researching comfrey in greater detail and what I found is truly amazing. Comfrey has been called knitbone historically, because it was used to treat sprains and broken bones. (It's also called boneset but that's misleading because there is another herb called boneset which is different.)
Comfrey has an amazing capacity to soak through skin and muscle and affect bones, if applied with a generous fresh poultice. In addition, a recent clinical trial has shown comfrey root ointment to be more effective than some pharmaceutical ointments in healing sprains. Another double-blind study has found comfrey to be effective in treating osteoarthritis of the knee.
It's ability to heal cuts is nothing short of stunning. And in fact sometimes comfrey heals cuts too fast. The first warning herbalists usually give about comfrey is that it can heal the skin over cuts and wounds so quickly that the body's natural function of expelling small bits of foreign matter (dirt, sand, bits of plants or cloth and so forth) from an open wound doesn't have time to work well. Some people have developed blood poisoning because comfrey's rapid-action healing sealed debris inside of a cut.
So, my story about speed healing my husband's finger comes with a caveat. Had i not flushed the wound out well enough or had it not bled so profusely, I could have made the situation worse by applying comfrey immediately. Generally, I now apply comfrey only after a cut is a few days old, just to be on the safe side. But that doesn't apply to sprains, arthritis, bruises and other injuries where the skin isn't broken.
The primary reason for comfrey's healing power is a delicate combination of chemical compounds in the plant that promote rapid cell growth.
Herbalists have experimented with using comfrey to treat certain types of cancer and there are several cases in which a patient with terminal cancer consumed large amounts of comfrey root powder and later miraculously recovered from the cancer. This briefly led to enthusiasm among herbalists for comfrey as a miracle herb. But then a study in Japan found that consumption of a large percentage of comfrey in the diets of rats was linked to liver cancer. And so the enthusiasm of herbalists has turned to caution and comfrey is usually not recommended for internal consumption.
My mother had a comfrey plant by her garden water faucet when I was a child and I ate quite a few of its leaves. They were juicy and mild. The plant isn't poisonous in the conventional sense. However, there is a chemical found in most parts of the comfrey plant (less in young leaves) that is linked to liver damage if consumed in large doses. You would most likely have to eat a huge amount of comfrey for it to be a problem, but it's good to remember that there is a warning against it.
Here is my homegrown and wildcrafting approach to comfrey:
- I haven't used the root because the leaves provide a ready source when the plant is local and you can control the amount of processing, although I think the use of comfrey root in commercial ointments may be a good choice for those who can't grow it. (Some people find that the bristles on comfrey leaves irritate sensitive skin. If you want to use fresh comfrey leaves instead of ointment, you can wrap a poultice in a light cloth.)
- Whenever possible I use a poultice of fresh comfrey leaves on sprains, strained muscles, bruises and the like. (Just take fresh leaves and mash them up with a bit of water. You can apply them directly to the skin or wrap them in cheese cloth. You can lightly heat the poultice to sooth muscles and bruises.)
- I use softened comfrey leaves to bandage cuts after they have been well cleaned and had a day or two to heal with disinfectant salves.
- I dry some comfrey leaves for making rehydrated poultices in the winter and for making comfrey infusions to soak sprains in the winter.
- I make comfrey infused oil to make salve (with this recipe) for older cuts and scrapes that are healing slowly.
Use the comment icon below to leave a message and share some of your stories of herbalist adventures, questions or experiences. I love your comments on these posts. Please remember that this doesn't constitute medical advice for a specific person with a specific medical condition.